

My Favorite Lesson: Rescuing Flat Landscapes
- 4,440 Views
 Posted by Dylan Kotecki
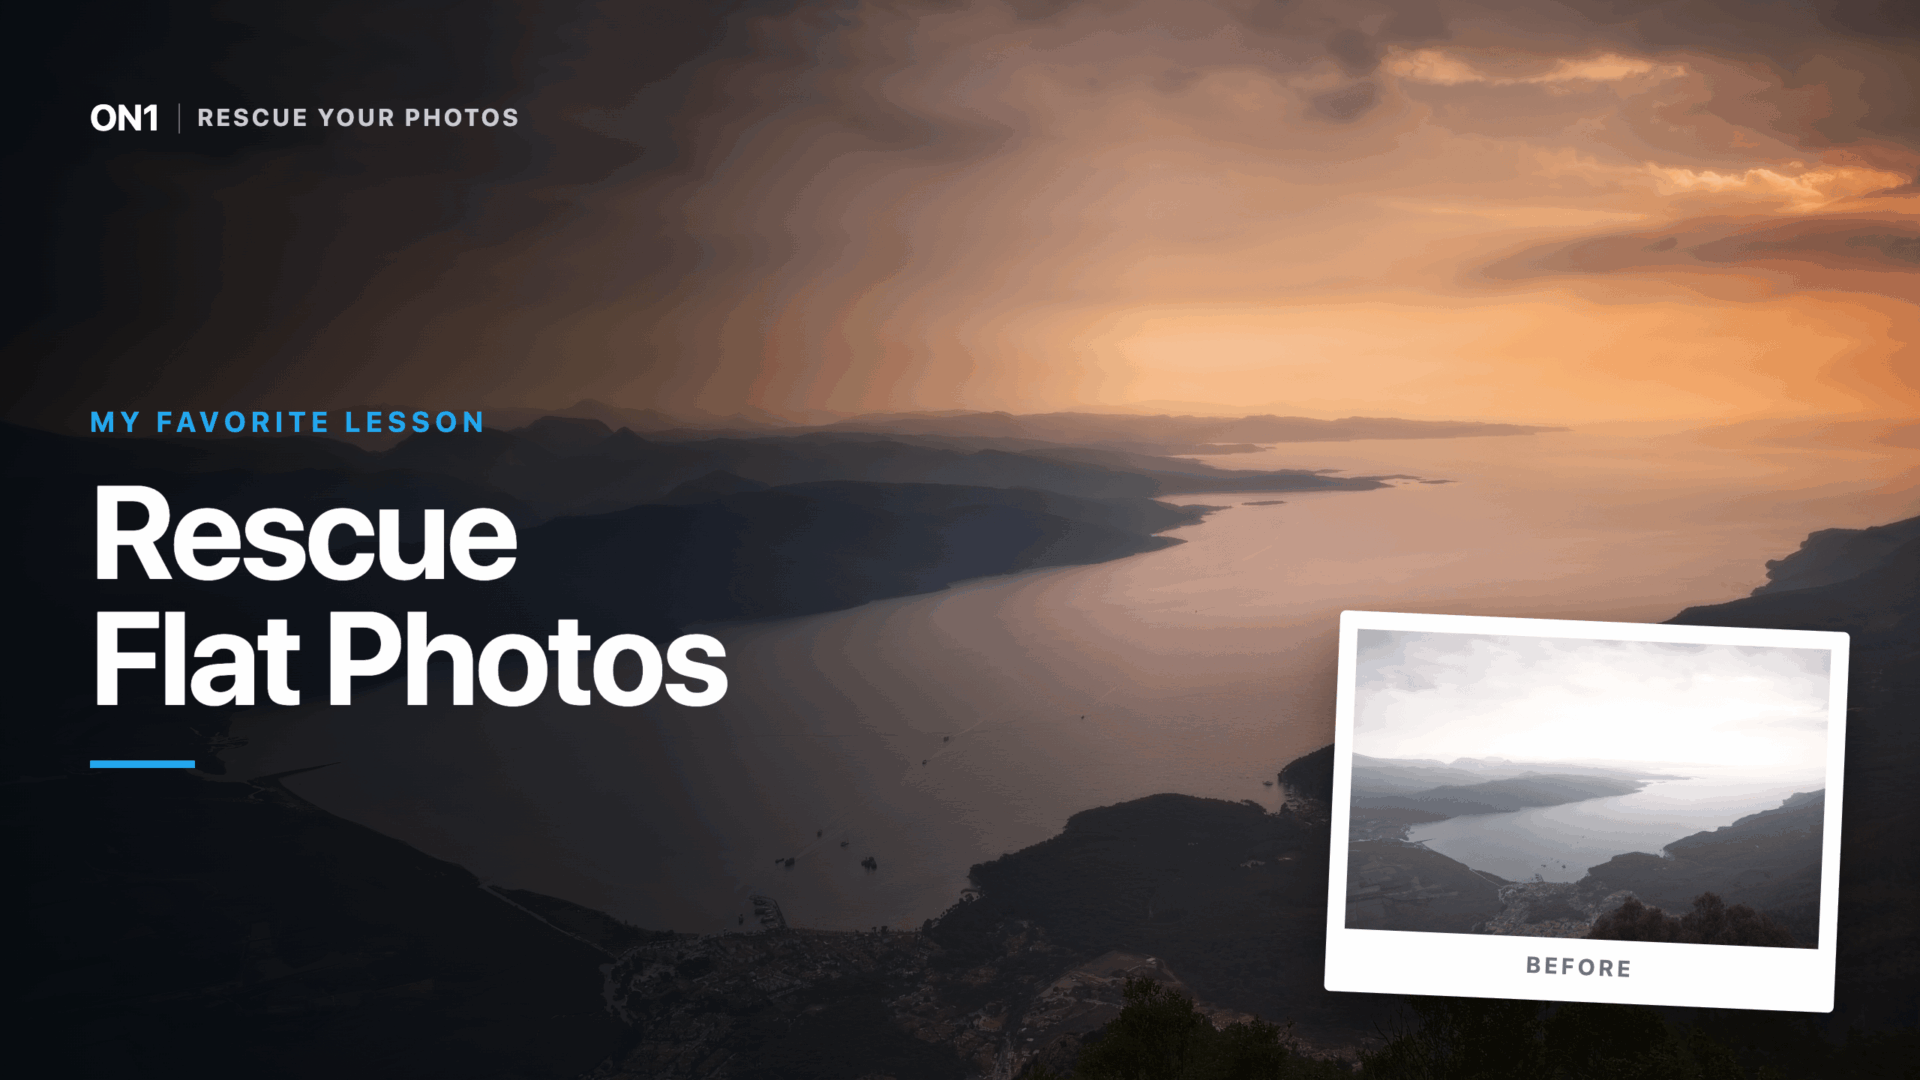
“Rescuing Flat Landscapes,” a lesson from ON1’s Rescue Your Photos Course, turns a hazy, lifeless landscape into one with real depth. The five steps: rebuild tone, clean up noise with NoNoise AI, shape light with a local gradient, warm the white balance, and finish with a Glow filter.
Every time I put together a course, people ask me the same question: “Which lesson is your favorite?” For the Rescue Your Photos Course, the answer is easy. It’s the lesson on rescuing flat landscapes, and I want to tell you why.
The problem every landscape shooter knows
You’ve stood on the overlook. The light was doing something incredible. You raised the camera, took the shot, and got home only to find… this.
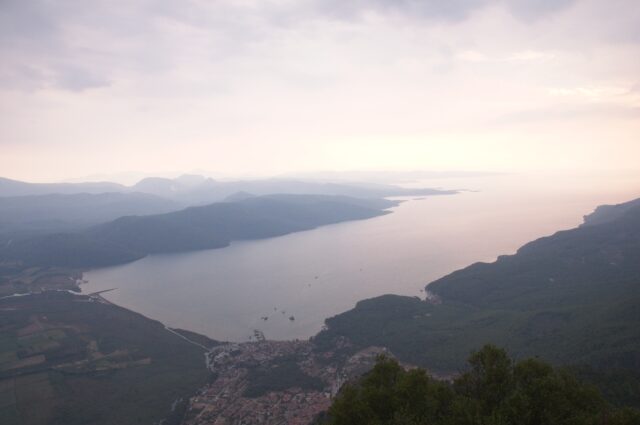
Flat. Hazy. Lifeless. The mountains fade into the sky, the color is muted, and none of the depth you felt standing there made it into the file. This is one of the most common problems I hear about from students, and it’s exactly why I built this lesson into the course. If you’ve ever looked at a landscape shot and thought “I know this was better in person,” this lesson is for you.
Why I love teaching this one
Most editing lessons show you how to fix one thing: exposure, or color, or noise. This lesson is different because it walks through the entire chain of decisions I actually make when I open a flat, dull landscape in ON1 Photo RAW. It’s less about any single slider and more about how the pieces work together to rebuild depth that got lost in the haze.
Here’s the path we take in the lesson.
1. Rebuild the tone
We start in the Develop panel, and instead of just cranking exposure, we work through Tone and Color deliberately: pulling exposure down to recover that washed-out sky, then building contrast back in and pushing midtones and shadows to give the water and mountains some real weight.
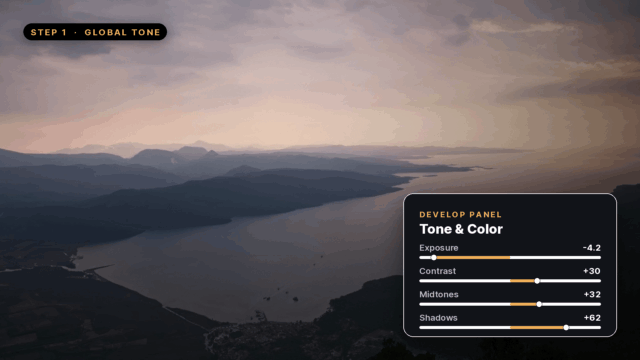
This step alone changes the entire mood of the photo. Where the original image reads as pale and thin, this pass starts giving the layers of mountains something to separate them from each other.
2. Keep it clean with NoNoise AI
Once contrast starts going back into a flat, hazy scene like this, noise and softness get more obvious, so before we go any further we run NoNoise AI to keep the file clean. It’s a quick pass, but it means every adjustment after this holds up at full size instead of falling apart under scrutiny.
3. Add a local gradient to shape the light
This is my favorite part of the whole lesson. Instead of applying every adjustment globally, we drop into the Local panel and draw a gradient across the sky, then dial in separate exposure and contrast just for that region.
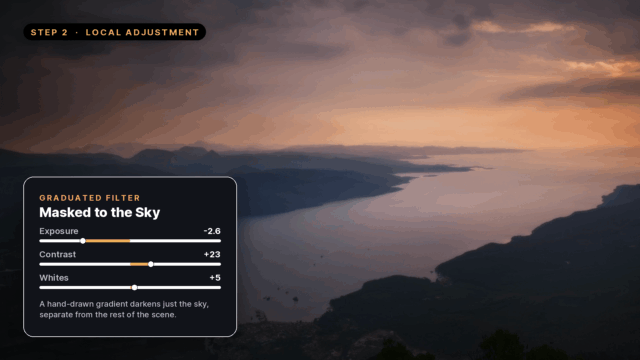
This is the trick that separates an edit that looks “processed” from one that looks like a graduated ND filter was on the lens the whole time. It’s the single technique I get the most questions about after people finish the course.
4. Warm it up
With the depth and structure in place, we shift white balance to bring some warmth into the scene, nudging temperature and tint so the color feels intentional rather than accidental.
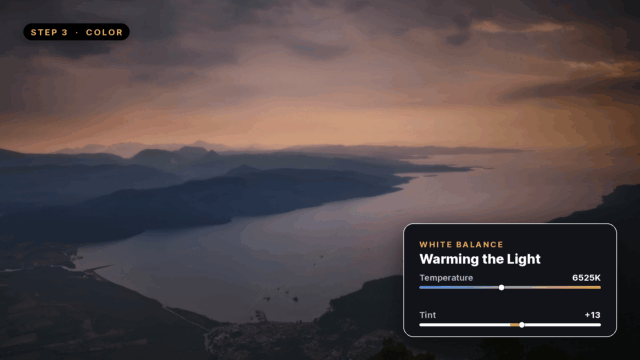
5. Finish with a Glow filter
Last, in the Effects panel, we add a Glow filter in Darker/Overlay Strong mode. It’s a small move, but it’s the difference between a photo that’s technically corrected and one that actually glows the way the scene did in person.
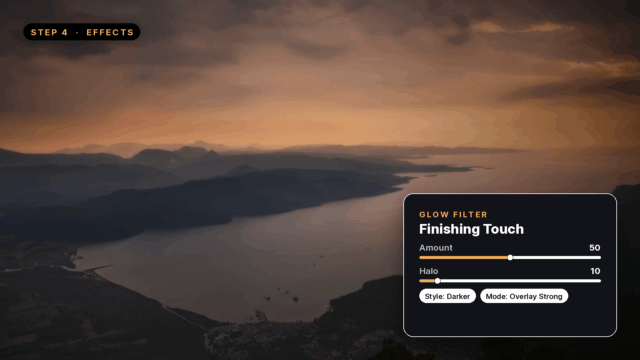
That’s the transformation: a flat, hazy snapshot becomes a landscape with real atmosphere and dimension, using nothing but tools already sitting in ON1 Photo RAW.
Why this lesson matters
I picked this one as my favorite because it’s the clearest example in the whole course of a philosophy I keep coming back to: rescuing a photo isn’t about one magic slider, it’s about a sequence of small, deliberate decisions that add up. Once you’ve been through this lesson, you’ll look at every flat, hazy landscape in your library differently, because you’ll actually have a plan for it.
If you’re working through Rescue Your Photos and haven’t gotten to this lesson yet, it’s worth jumping to. And if you’ve already taken it, I’d love to hear how it changed the way you look at your own flat landscape shots.
Haven’t watched Rescue Your Photos yet?
This lesson is just one small piece of it. The whole course is built around the same idea: most “bad” photos aren’t actually lost causes, they just need a little know-how. Flat landscapes, blown-out skies, muddy color, that folder of shots you’ve been meaning to delete, there’s something in there for all of it.
If you’ve got photos sitting around that you gave up on, give the course a look. You might be surprised what’s fixable.
Please review our privacy policy for information about how we use the data we collect.