What's new:RAW Processing Engine+NoNoise AINew in 2027: RAW Processing Engine, Enhanced Masking Experience, NoNoise AI, Tack Sharp AI Deblurring, Enhanced Brilliance AI, AI Culling Assistant in MAX, Light Theme, Faster AI Tools, and much more.
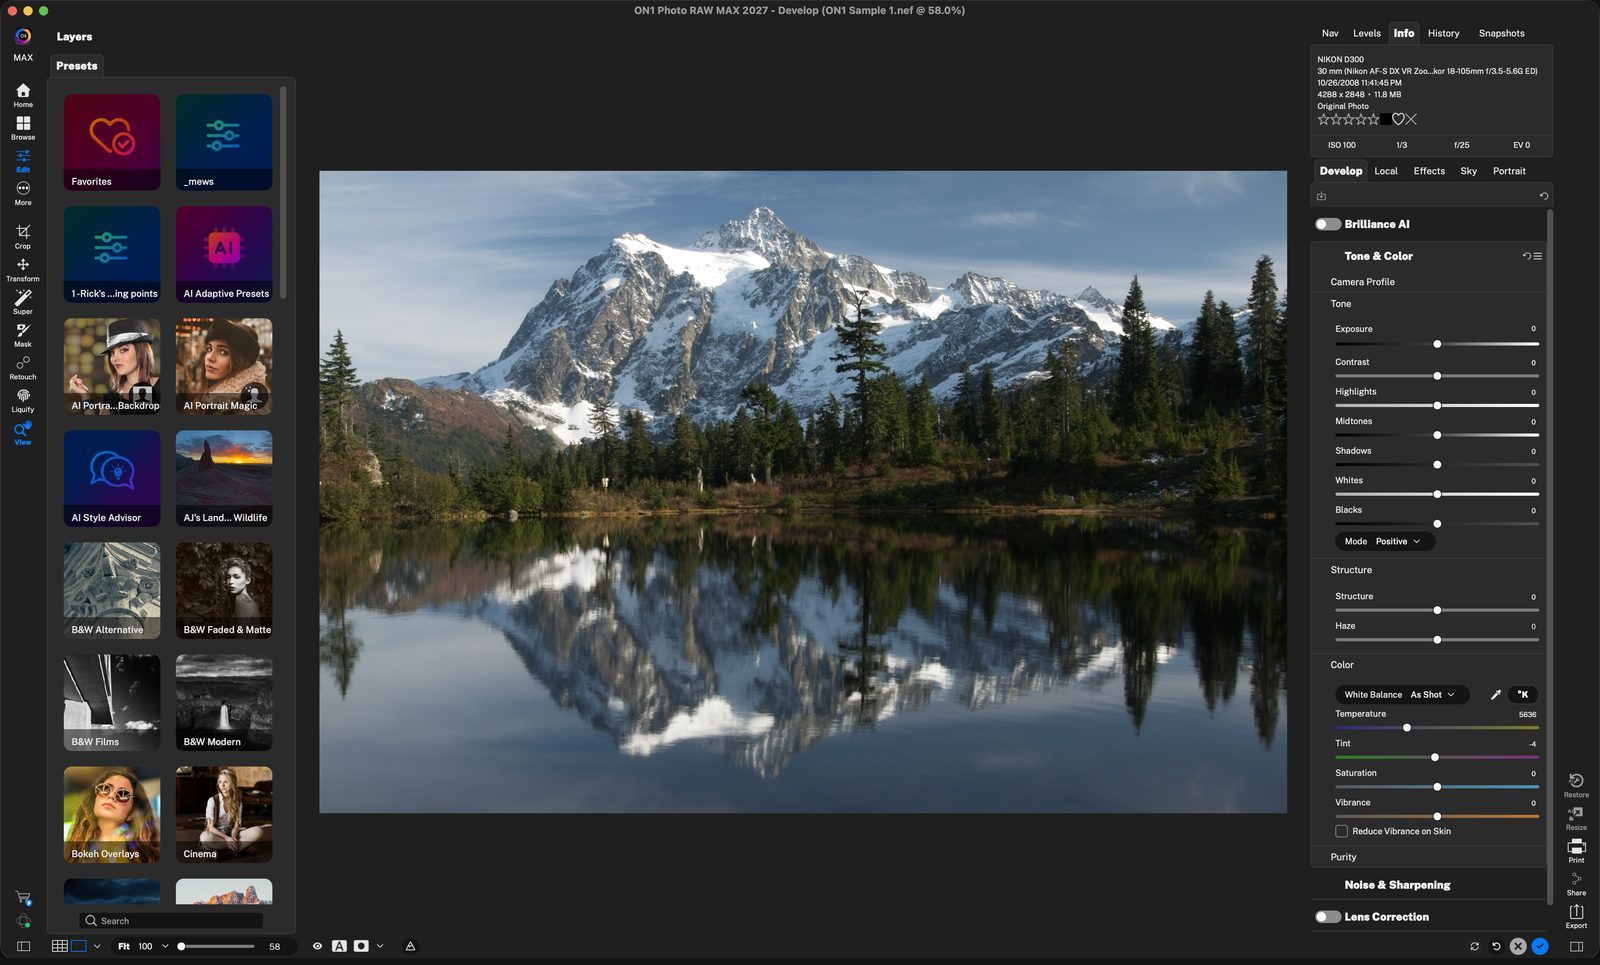
Develop is where you make global edits: brightness, color, noise, lens fixes and perspective.
Start with Brilliance AI
Brilliance AI studies the photo and sets tone, color and white balance for you. It is the quickest starting point.
Tone & Color
The main pane for brightness, contrast and color. Every slider starts at 0, so you always begin from the original RAW file.
Noise & Sharpening
Reduce grain and sharpen detail. Classic works in real time; the AI options process the RAW file first.
Lens Correction
Fixes problems caused by the lens itself: barrel distortion, color fringing and dark corners.
Transform
Corrects perspective and tilt, such as leaning buildings or a crooked horizon.
DevelopYou are on the Develop tab. Its panes are stacked on the right, top to bottom, in the order most edits happen. Click anywhere to continue
PresetsOne-click looks on the left. Click a category to browse it; you can fine-tune any preset with the panes on the right. Click anywhere to continue
Turn it onClick the Brilliance AI switch. Click anywhere to continue
Fine-tune itAmount sets the overall strength. Under Fine Tune, Tone Amount and Color Amount adjust each part. Local Adjustments lets it improve areas like the sky separately. Click anywhere to continue
Sliders set for youOpen Tone & Color to see what Brilliance AI changed: Exposure 0.32, Highlights -31, Shadows 11, White Balance Auto. You can adjust any of them. Click anywhere to continue
Camera ProfileSets the overall look of the RAW file: ON1 Standard, Landscape, Portrait, Vivid or Neutral.
(Click empty space next to title to expand/collapse pane contents) Click anywhere to continue
ToneExposure brightens or darkens. Contrast adds punch. Highlights and Shadows recover detail in bright and dark areas. Whites and Blacks set the end points. Click anywhere to continue
StructureStructure adds or softens fine detail. Haze removes fog or haze when you move it left. Click anywhere to continue
ColorWhite Balance, Temperature and Tint fix the color cast. Saturation and Vibrance control how rich the colors are. Click anywhere to continue
Pick a methodClassic is traditional noise reduction and sharpening. NoNoise AI removes noise, Tack Sharp AI fixes softness or blur, and Both runs the two together. Click anywhere to continue
ClassicLuminance and Color reduce grain, Detail keeps edges crisp, and Amount and Threshold control sharpening. Best for clean, low-ISO photos like this one. Click anywhere to continue
NoNoise AIChoose the subject type, such as General or Astro, then the Model. The view zooms to 100% with a before/after divider so you can judge the result. Click anywhere to continue
ApplyClick Apply to process the photo with NoNoise AI. Click anywhere to continue
Locked inThe settings lock and the button changes to Adjust. Click Adjust any time to change them. Click anywhere to continue
Turn it onClick the Lens Correction switch. Click anywhere to continue
Automatic profilePhoto RAW reads the lens from the photo, here a Nikon 18-105mm, and applies its profile. Use Distortion, Color Fringe and Fall-Off to fine-tune. Click anywhere to continue
Transform. Quick fixesKeystone, Horizontal and Vertical straighten converging lines. Level straightens a tilted horizon when you drag along it. Click anywhere to continue
Fine controlVertical, Horizontal, Rotation, Aspect Ratio and Skew adjust the shape. Amount scales all of them at once. Choose a grid to help line things up. Click anywhere to continue
DoneClick the blue check in the lower-right corner to keep your edits and return to Browse. Edits are non-destructive, so the original is never changed. Click anywhere to finish
Tour complete
You know the Develop panes: Brilliance AI, Tone & Color, Noise & Sharpening, Lens Correction and Transform.