

When editing photos, masking can be a potent tool in post-processing. The ability to apply filters and adjustments selectively using masking techniques opens an entirely new world of possibilities with a photo’s look. Factor into that the tools needed to mask or brush away layers and objects, and you’re well on your way to creating a work of art with a composite of images. With an array of masking tools, ON1 Photo RAW makes selective editing with masking incredibly fun and easy. Here are some of my favorite tips and tricks for getting the most out of my masks.
In This Article:
- Use Your Brush Edge to Your Advantage When Masking Images
- Using the Perfect Brush to Refine Your Masking Edges
- Utilize Different Masking Shapes & Gradients
- Chisel Your Mask for Cleaner Looking Edges
- Use a Color Range Mask to Selectively Apply Filters or Adjustments
- Improve Your Photo Masking with ON1’s Photo RAW Software
ON1 Photo RAW gives you all the masking tools you’ll ever need to tap into your creative side. Try Photo RAW free for 30-days. It works on both Mac and Windows and will not watermark your photos during the trial period.
1. Use Your Brush Edge to Your Advantage
Most of the time, when I’m masking an image, whether it be a filter or a layer, I have my Brush Feathering set to 100. I like to keep my brush edge soft because it allows for a smoother and more natural transition between modified and unmodified areas on my photographs. In this image, for example, if I wanted to lighten up the background using a Local Adjustment, I could use a very soft brush edge to make sure that the strokes blend in well with the other areas of my photo.

Feathering at 100
With the brush feathering at 100 we can be a lot less careful when brushing compared to a hard brush edge and it still maintains a natural look.

Feathering at 0
If I were to lower the feathering of the brush to 0, it would create a very unnatural looking adjustment on the shot. The adjustment would start to create harsh contrasted edges on the image where it was painted.

That’s not to say you can’t modify your feathering to fit your shot. Of course, there are situations when you would need to change your brush edge so it will not bleed into any of the adjustments onto a particular area or object on your photograph. The best thing about photo masking is that it is non-destructive, so you can always revert to your original shot.
2. Using the Perfect Brush to Refine Your Masking Edges
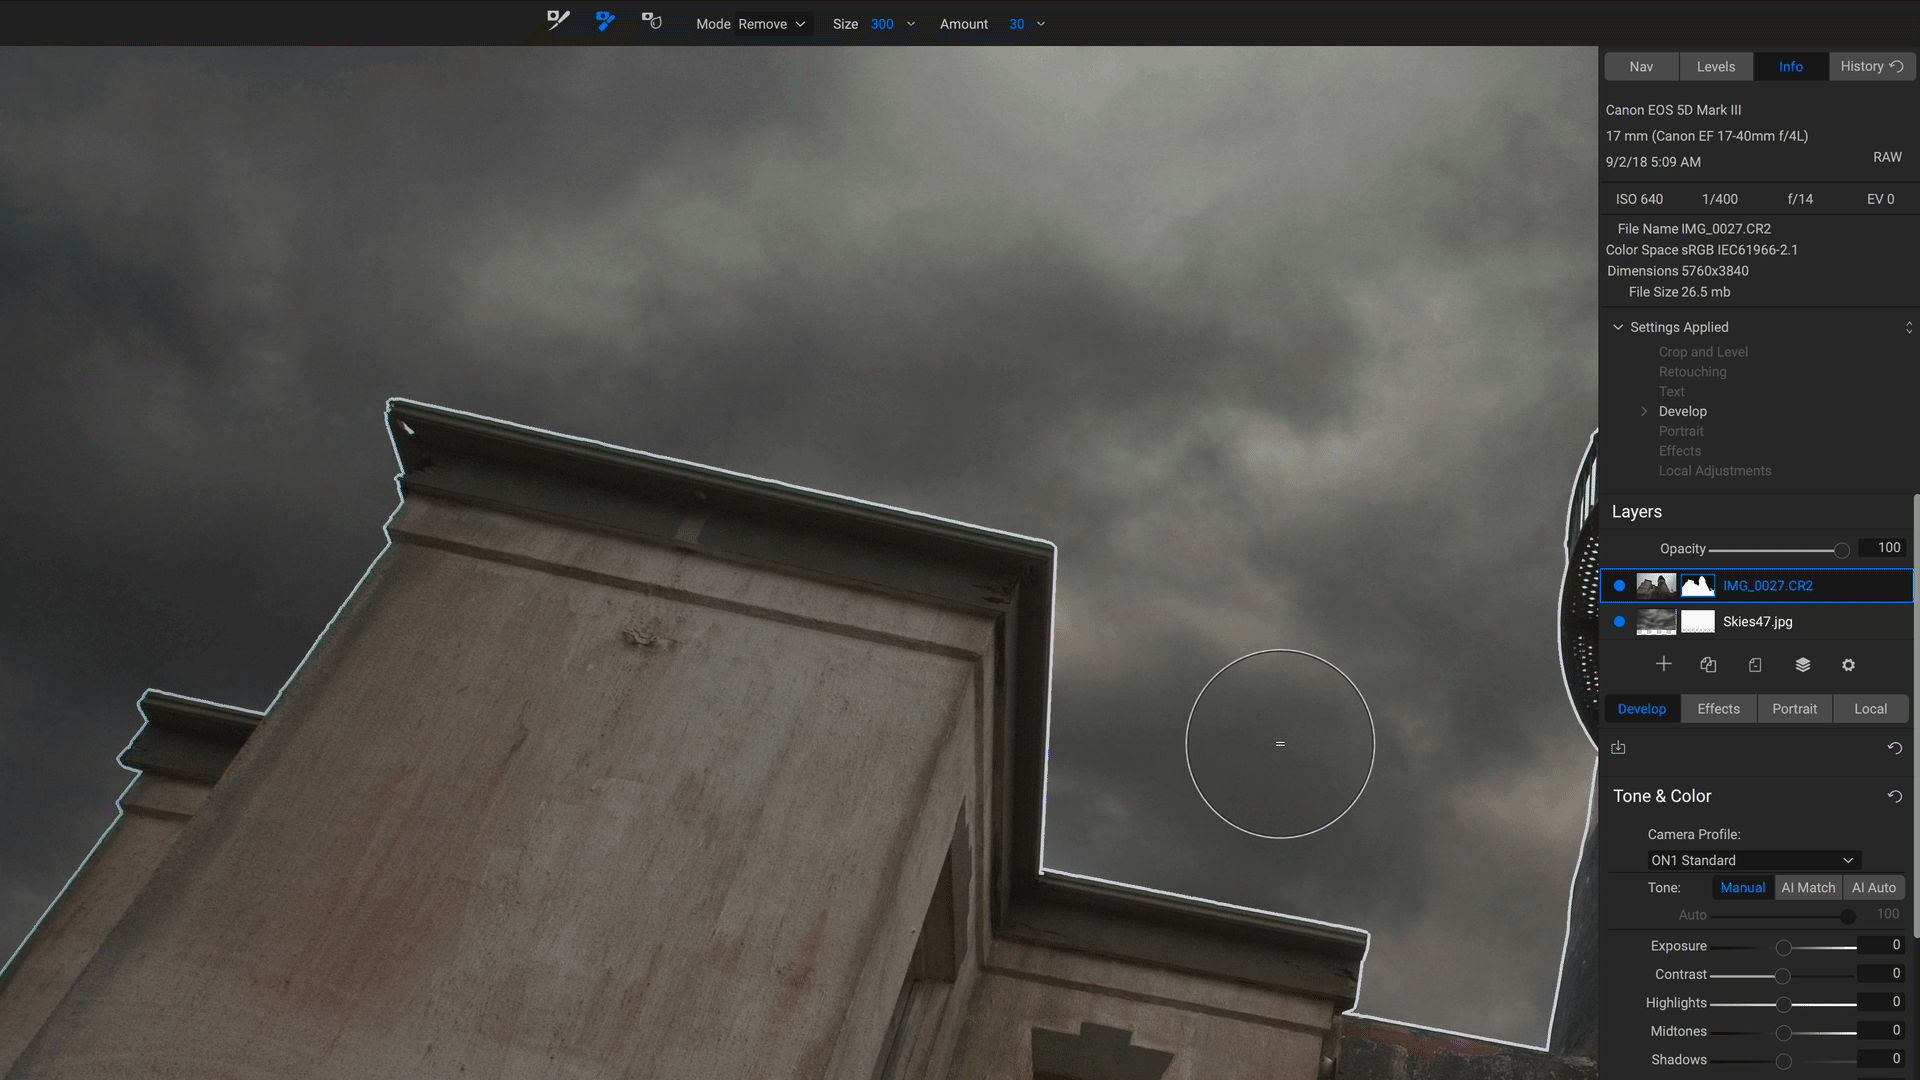
The Perfect Brush is an excellent tool for helping out the edges of your mask. I like to use the Perfect Brush for cleaning up the sides of my mask, whether I’m replacing a sky or I’m modifying the edges around a portrait, and I don’t want to alter any skin tones. To enable the perfect brush, make sure you have a brush selected and enter (CMD + R) on your keyboard. With this image, I’m trying to replace the sky behind Haystack Rock. I’ve used my Masking Brush to remove a portion of my base layer and reveal the new sky layer underneath, but I have a messy edge near the top of my rock. If I want to maintain the naturalness of the image, I need to refine the sides of the mask. The Perfect Brush will work perfectly in this situation. To improve the edges of a mask with your perfect brush, make sure you keep the Plus or Minus sign (depending on what Brush Mode) stays on top of the adjustment or layer you are looking to brush away/add. By keeping the middle of the brush over your targeted area, you will protect the different tones near the edges of your brush, making sure they don’t get modified.

3. Utilize Different Masking Shapes & Gradients
If you’re looking to blend an adjustment onto a shot with ease, the Adjustable Gradient and Masking Bug are going to be your best bet. These tools use shapes and gradients to blend adjustments and filters into your photograph. By using a gradient to mask, you can protect specific areas in your photos without sacrificing harsh edges. The gradients work well if you’re looking to protect your foreground or background from an adjustment because you can adjust your mask feathering, position, size, and you can even rotate. In this image, I’m using my Adjustable Gradient (Shift + K on your keyboard) to apply the Lighten Local Adjustment Layer to the top of my image; brightening the area where the couple is so that they stand out in the frame more.

Original Photo

With Local Adjustment Applied to the Top
Gradients and Radial masks also work great when targeting light on your photo. One thing I like to use them for is to create custom vignetting in my scene. When you select either the Masking Bug (B on your keyboard) or the Adjustable Gradient, you can modify the shape in the top tool modifier bar. When you choose the Center shape, for example, it will apply the adjustment everywhere except the center of your mask. If you select the Edges shape, it will apply the modification strictly to the inside of the mask, protecting everywhere outside of it. These are beneficial tools if you want to focus the viewer’s attention on a particular area of your shot. In this portrait, I’m using an Adjustable Gradient set to Edges to focus the Lighten Local Adjustment Layer on the inside of the mask and brighten where the couple is standing.

4. Chisel Your Mask for Cleaner Looking Edges
The Chisel Tool may be suited best for composite masking when you’re working on multiple layers, but it will still help with substantial adjustments and filter modifications. Sometimes when we are masking, we leave a halo edge around our mask that makes the photo look a little wonky. An easy way to get rid of that pesky edge is to use the Chisel Tool. The Chisel Tool lives in your Masking Tools in the Tool Well on the left side of Photo RAW. You can also select it by holding down Shift and hitting H on your keyboard (Shift + H). Just make sure you have your mode correctly set (paint in or out), and then brush the Chisel Tool onto the edges of the mask to remove the unwanted extras. The Chisel Tool will only brush away the halo edges around your mask and won’t modify anything inside of it. If you double-click the Chisel Tool icon in the top tool modifier bar, it will remove the halo edges around your entire mask edge rather than having to paint it onto the whole thing.

Double Clicking the Chisel Tool Icon
5. Use a Color Range Mask to Selectively Apply Filters or Adjustments
A Color Range Mask is a great way to target specific colors in your photograph. When applying this mask, it will apply the adjustment or mask to the specified color, protecting the rest of the tones in the scene. I like to use Color Range Masks when applying detail to make sure that particular objects or subjects pop out in the frame. To create a Color Range Mask, go into the Masking Options for your filter, local adjustment, or layer and select Color Range to enable. Now choose a color from the color box, or you can use the color dropper to select a color in your photo. You can always modify the amount of color with the Range slider below; this will control how much of that color gets affected. In this image, I’m using the Color Range Mask to apply my Dynamic Contrast Filter to the strawberries.


Improve Your Photo Masking with ON1’s Photo RAW Software
ON1 Photo RAW gives you all the masking tools you’ll ever need to tap into your creative side. Try Photo RAW free for 30-days. It works on both Mac and Windows and will not watermark your photos during the trial period.
16 comments on “5 Ways To Improve Your Image Masking During Editing”
On January 10, 2020 at 9:09 pm David Lohrman wrote:
this was helpful
On January 13, 2020 at 7:06 am Thomas Ireton wrote:
Nice reminders about tools that I should use more frequently. A good presentation
On January 13, 2020 at 9:38 am Robert Scott wrote:
Very interesting and useful. Many thanks.
On January 14, 2020 at 9:28 am Robert COTE wrote:
Seeing this in writing is a very nice complement to the videos on these tools.
On January 15, 2020 at 6:04 am Rashmideva Veldhuizen wrote:
I like the way you presented this. It shows very clearly the Masking options in several situations.
My question : is it possible that I can download this (as a video)?
Yours sincerely,
Rashmideva,
Netherlands
On January 23, 2020 at 6:05 am Yvan wrote:
Thanks!
To ON1 team: we need a list of these little tricks like “double-clicking” on the chisel tool mentiioned above. It would be very helpful.
On January 23, 2020 at 8:16 am Robert Shrader wrote:
Dylan, thanks very much for these reminders. I had forgotten about the Chisel Tool behavior.
On January 23, 2020 at 1:51 pm bcaskey wrote:
I agree with the previous comments. We all need reminding of the tools which are available to us in On1 Photo Raw. This was excellent instruction.
On January 23, 2020 at 2:29 pm william ballard wrote:
Some useful tips and some I have not been using.
On January 23, 2020 at 4:20 pm Angela Gauld wrote:
Very useful! Thanks Dylan. And thanks to On1 for the Bookshelf.
On January 24, 2020 at 9:03 am Ray Cummings wrote:
Very well thanks, much-appreciated info.
On January 24, 2020 at 11:01 am Vernon Carlson wrote:
Very helpful.
On January 24, 2020 at 12:44 pm Stefano Vallebuona wrote:
Grazie per questi consigli utili e molto chiari.
On January 24, 2020 at 2:44 pm Ken Smith wrote:
Useful tips …. now I just have to master them – Thanks
On January 26, 2020 at 11:08 am Ron Spoto wrote:
Very helpful, Thanks
On January 27, 2020 at 12:39 pm Elizabeth Girardeau wrote:
Thanks. I do a lot of masking and wasn’t sure I was going to learn anything new here. But I did. I did not know about double clicking on the chisel icon not did I know much about color range masking in individual filters, like dynamic contrast.
Please review our our privacy policy for information about how we use the data we collect.