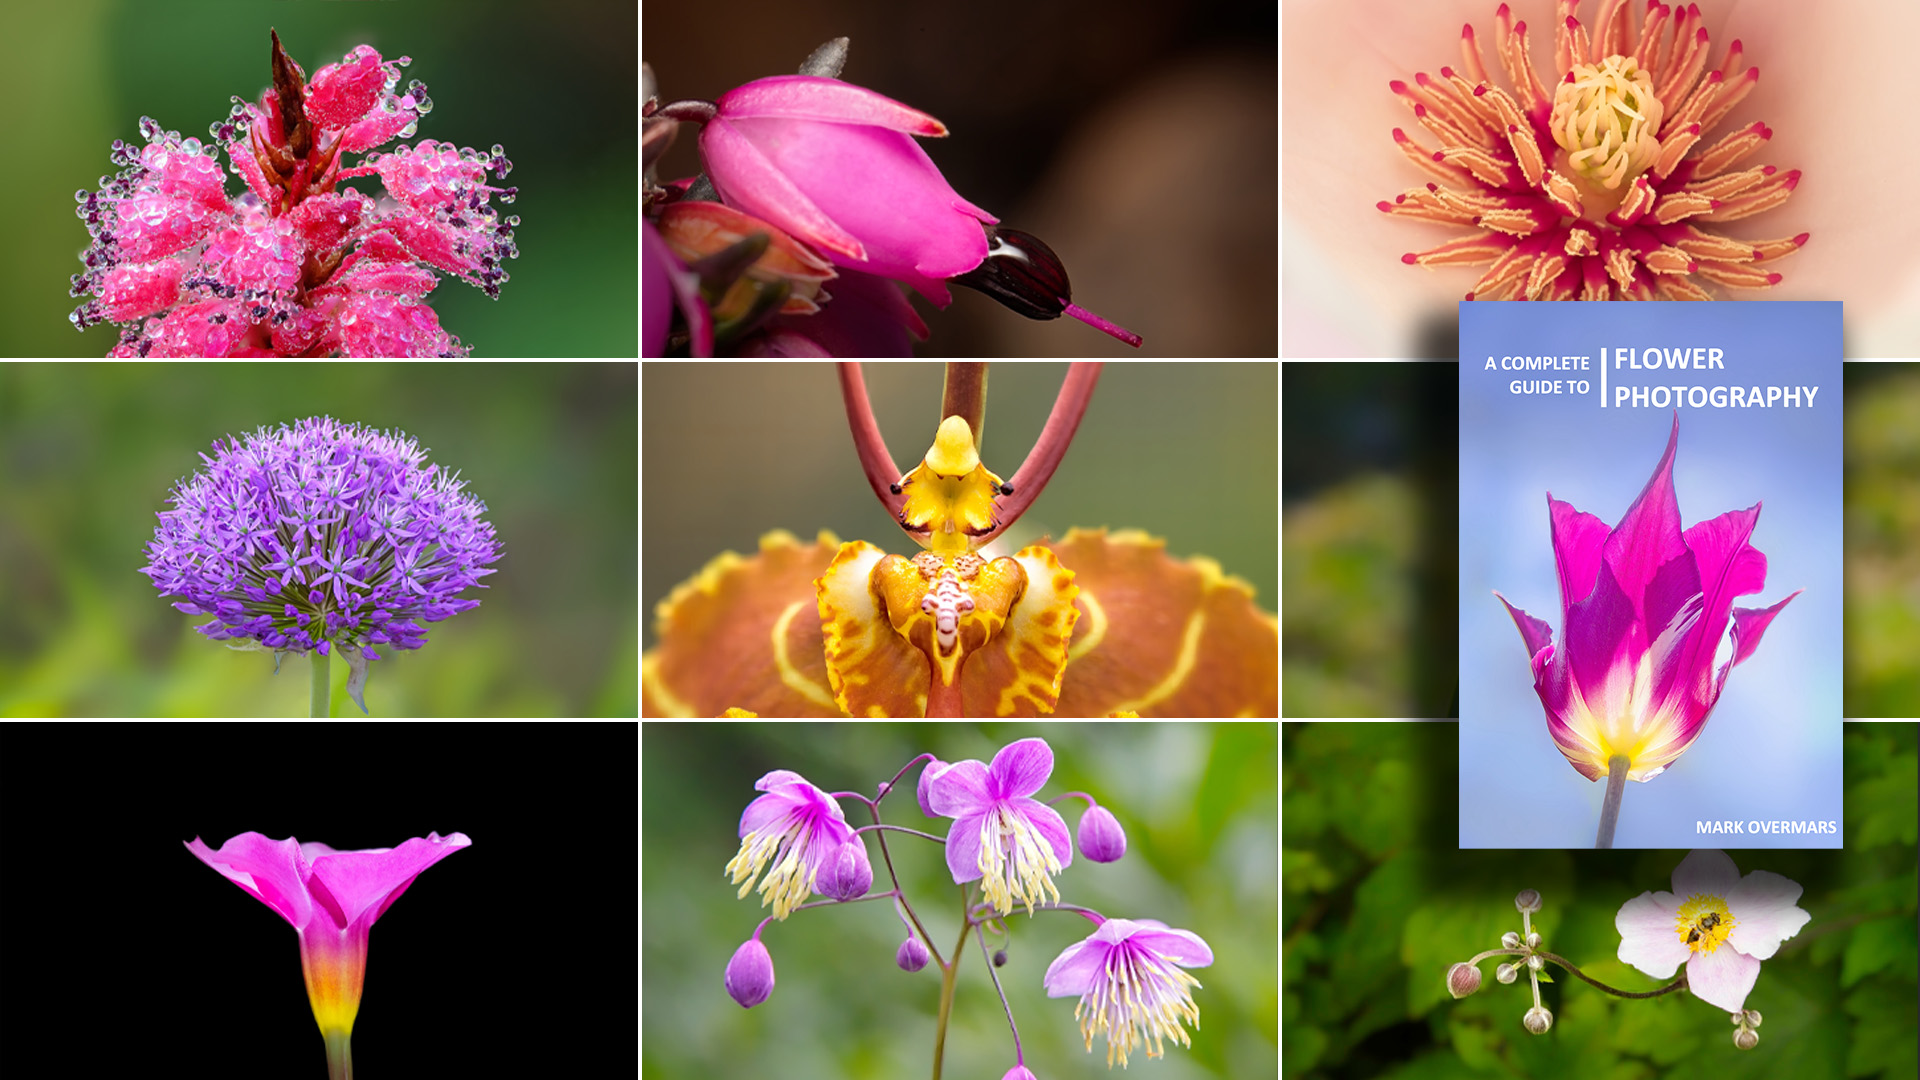
November 14, 2018 | 11104 Views | By Colin Smith

Free ON1 Plus Preview: Dodge and Burn with Colin Smith

In this video, watch me show you one of my favorite post-processing techniques, dodging and burning. I took this long exposure photo using one of my cinematic lenses, but I find it is a lot of fun to play around with in still photography. I’ll also share with you in this video why I believe using Wacom tablet with pressure sensitivity is best for making local adjustments. Enjoy this edit and please leave any questions or comments below.

You are watching a free video preview from ON1 Plus. If you want more videos like this and Become a Master of ON1 Photo RAW join Plus today! Learn more »


33 comments on “Free ON1 Plus Preview: Dodge and Burn with Colin Smith”

  1. On November 14, 2018 at 11:08 am David Price wrote:

    David Price

    Hi Colin
    Very good. You make a sound case for taking our photos that little bit further.
    Best Wishes, David Price.

    1. On November 15, 2018 at 9:15 am Colin Smith replied:

      Colin Smith

      That last bit makes a difference

  2. On November 14, 2018 at 11:43 am topierrelacroix wrote:

    topierrelacroix

    Congratulations for your work. Your approach adds an artistic effect to photography. I will certainly apply these techniques as I did in a darkroom.

  3. On November 14, 2018 at 3:37 pm Bryan Stern wrote:

    Bryan Stern

    Loved your video. Really great and useful. I will certainly use your ideas for Dodge and Burn. Love how you do it. Much thanks.

    1. On November 15, 2018 at 9:15 am Colin Smith replied:

      Colin Smith

      Thanks, it’s my favorite part of editing

  4. On November 14, 2018 at 7:39 pm Adam Rubinstein wrote:

    Adam Rubinstein

    What a wonderful video recalling the power of dodging/burning.

  5. On November 15, 2018 at 2:35 am Chris Mullett wrote:

    Chris Mullett

    I saw this and thought just another video on dodging and burning. I nearly didn’t watch it, but I’m glad I did. A totally different approach to post and the use of D & B. Thank you, I will be rethinking my workflow and incorporating what I’ve learned from this.

    1. On November 15, 2018 at 9:15 am Colin Smith replied:

      Colin Smith

      Thanks Chris, Im glad you watched it

  6. On November 15, 2018 at 12:54 pm Johannes Pokorn wrote:

    Johannes Pokorn

    Thanks a lot, great introduction to d&b. Reminds me a bit of what we used to do in the b&w darkroom long ago with our hands, cardboard cut-outs and God knows what 🙂
    Is there any Wacom you would recommend (for non-professionals)?

    1. On November 17, 2018 at 12:26 pm Colin Smith replied:

      Colin Smith

      I always prefer the Intros Pro Medium. Its a great tablet and just the right size

  7. On November 15, 2018 at 2:50 pm Linda Sheppard wrote:

    Linda Sheppard

    Enjoyed seeing this. A lot of good suggestions and instruction.

  8. On November 15, 2018 at 5:38 pm Bart M Carrig wrote:

    Bart M Carrig

    Fascinating ! Great artistry, great ideas. Thank you.

  9. On November 16, 2018 at 7:32 am Bryan Stern wrote:

    Bryan Stern

    Referring to an earlier (unanswered question) on which Wacom tablet to choose, I basically have the same question. I have been using an Apple External trackpad with my iMac and have resisted getting a Wacom tablet till now. I am a hobbyist and had trouble justifying the price.
    After watching this video (for the second time – it’s that good), I have decided to purchase a tablet. Is it worth it to spring for the latest Medium sized Intuos Pro or is the cheaper (older) small size that Wacom is still selling for $100 less with the older pen technology (almost) equally good for photo editing.
    Anyone’s thoughts are appreciated.

    1. On November 17, 2018 at 9:48 am Carmen K replied:

      Carmen K

      I thought I share my thoughts:
      I’ve had an old Intous 3 medium size for many years and it’s still working perfectly. Someone at work said I should get one because I was developing an awful paint in my wrist while using the mouse. So I bought one and it saved my wrist.
      I think the medium size is just right for working with photos and anything else you want to do.
      As for the new Wacom. I want to purchase the new Intuos Pro medium size. I look forward to the pen pressure sensitivity and tilt as well. I was happy to have purchased my Wacon long ago and I think the cost was justified then and it is justified now, due to Wacom’s long lasting excellent quality. I also consider myself a new hobbyist with the hope of moving upward into the artistic world of photography. 🙂
      Best regards.

      1. On November 17, 2018 at 12:30 pm Colin Smith replied:

        Colin Smith

        I agree on the Medium size. I have tried 3 difference sizes and the medium is the goldilocks.

    2. On November 17, 2018 at 12:28 pm Colin Smith replied:

      Colin Smith

      Depends which older one you are referring to. Check the specs and see how many levels of pressure it supports. That does make a big difference.

  10. On November 17, 2018 at 3:00 pm Wayne Gallagher wrote:

    Wayne Gallagher

    Excellent video, great teaching technique. You have me re-thinking a lot on my workflow. Thank you very much.

  11. On November 18, 2018 at 3:45 pm Rubi Rodriguez wrote:

    Rubi Rodriguez

    Enjoyed your video. Great way to do D&B, so much easier and it does give you quite a bit of control. Thank you.

  12. On November 19, 2018 at 8:40 am Catherine Tremerryn wrote:

    Catherine Tremerryn

    A different way of starting the edit and so effective. A wonderful tutorial – thank you.

  13. On November 19, 2018 at 3:46 pm David Noland wrote:

    David Noland

    Great Video Lesson Colin.
    Remember your book Photoshop CS Trickery and FX
    where you showed how to create the Plants.
    I used you book to create my own with you lessons and it came out great.
    Think i did this sometime in the 90s.
    Maybe i could post it in ON1s Gallery
    Thanks David Noland

    1. On November 20, 2018 at 11:45 am Colin Smith replied:

      Colin Smith

      Hi There, I think Stephen Burns wrote the Trickery book I did Photoshop Most Wanted 1 and 2 back then.

  14. On November 20, 2018 at 11:35 am Bryan Stern wrote:

    Bryan Stern

    Watched the video for the third time. Yes. It is that good. Anyway, I bought a Wacom tablet at your suggestion. The learning curve is not as bad as some have said – for me at least, but a challenge I can embrace.
    You chose 40 and 20% opacity in you video. Is this your normal method. Can you explain your opacity choices using the Intuos Pro a little more deeply. Do you ever use 100% and compensate with pressure?
    Also, can you explain your feather choice?
    Thanks so much

    1. On November 20, 2018 at 11:44 am Colin Smith replied:

      Colin Smith

      Hi there
      I prefer to use a low opacity and build it up with pen pressure, unless its fine detail, then I go higher so I don’t have to paint over as many times. These settings will vary from user to user depending on if you are heavy handed or light handed, I tend to be heavy handed. I use a soft h=feather because it gives a painterly look. If you are looking for something more crisp, then reduce the feather, although its harder to blend the strokes together with a hard edge.

  15. On November 20, 2018 at 9:32 pm Bryan Stern wrote:

    Bryan Stern

    Thank you for the response. I traded in the small Wacom I just purchased and got the Medium, at your suggestion. Only used it for an hour or so – so far, but I do like it better. Certainly a much more premium looking device.

  16. On November 22, 2018 at 1:01 pm Pat Sanders wrote:

    Pat Sanders

    this just became one of my favorites! ..and it makes so much sense! Thank you!

  17. On November 29, 2018 at 12:16 pm Gordon Lewin wrote:

    Gordon Lewin

    My God! The darkroom returneth. What a revelation you have shown. This process will be lots of fun to explore. Thank you for widening my horizons.

  18. On December 1, 2018 at 9:22 am William Gardner wrote:

    William Gardner

    Really appreciate what you have shared during the month. I hope you will be back to teach more. I got a Wacom tablet after watching you work with it – am really excited about using it. Initial results are amazing. I would appreciate it if you could make any suggestions about how you have yours set up to maximize for On1. Thanks/

  19. On December 2, 2018 at 11:01 am Robert J Battaglia wrote:

    Robert J Battaglia

    I apologize for being so late to the comments. Your tutorial was outstanding for me!! Love your work flow. You built upon another tutorial on painting with light and explained some other questions. Thank you so much!
    Hope you will answer a couple questions that cause me confusion:
    1. If a photo is overly under/over exposed, would you use Exposure to correct prior to Dodging & Burning?
    2. Unfortunately, I need to know more of your thought process in determining the settings for the Dodge & Burn local adjustments. What are you looking for in general to determine the settings? I know the settings would vary based upon each photo, but using the tablet you must have a routine thought process for your determinations.
    Thank you so much!!

  20. On December 5, 2018 at 8:54 am bpoulter77 wrote:

    bpoulter77

    Thanks for the demonstration. I’ve used dodging and burning in Photoshop for years and have been missing that function in On1. Thanks for showing how to set it up. Although it is a bit more involved in configuring the two settings, it does appear to give more flexibility in the effects it provides. Now I’m even more in love with On1. 🙂

  21. On December 7, 2018 at 5:39 pm Steve Abley wrote:

    Steve Abley

    Who said you can’t teach an old dog new tricks? For many years have dodged and burned my way through the film darkroom and now the digital darkroom and this is the first time Ive seen it done on the front end. I will definitely try it your way – good job!

Leave a Comment