

John Rawlins is a QA Engineer here at ON1 and enjoys landscape, sports, real estate and aerial photography. He’s also into gadgets. A little over a year ago he started looking at drones. The combination of photography and a nifty flying gadget were too much for him to resist. The newer portable drones sealed the deal because he wanted something to take with him when traveling. As you can see from the photos below, he’s had a lot of fun over the last year with his drone photography. Whether shooting panoramas of the Cascade mountains or chasing water skiers at the lake, John’s been having a blast. Of course, when he gets home, it’s ON1 Photo RAW to organize and finish his shots.
The popularity of drones has exploded over the last couple of years. Prices are falling making them more accessible for both professional and amateur photographers. I jumped on the bandwagon about a year ago when I got my DJI Mavic Pro.
Since then I’ve found a bunch of features in ON1 Photo RAW 2018 that work well with my aerial photos.
First, the Import feature is great for downloading and organizing my photos and videos. During the import process I can do things like:
- Automatically create backup copies to my external drive
- Add keywords that identify the location (e.g., Lava Butte) or job (e.g., 123 Main St.)
- Add copyright information to the metadata
- Automatically organize my photos into folders by capture dates
Another thing that is useful is lens correction. The wide angle lens on my drone creates noticeable distortion on the edges of photos. ON1 Photo RAW 2018 has a built-in profile for the lens on my Mavic that automatically corrects the distortion. For drone models where a built-in profile isn’t available it is easy to make manual adjustments using the Lens Correction pane in the ON1 Develop module.
I enjoy shooting panoramic photos with my DSLR. Now it’s one of my favorite things to do with my drone. I use the ‘Pano’ feature in the DJI Go application to automatically shoot the photos. After importing the images, I stitch them together using the Create Panorama feature in ON1 Photo RAW 2018. The results are awesome.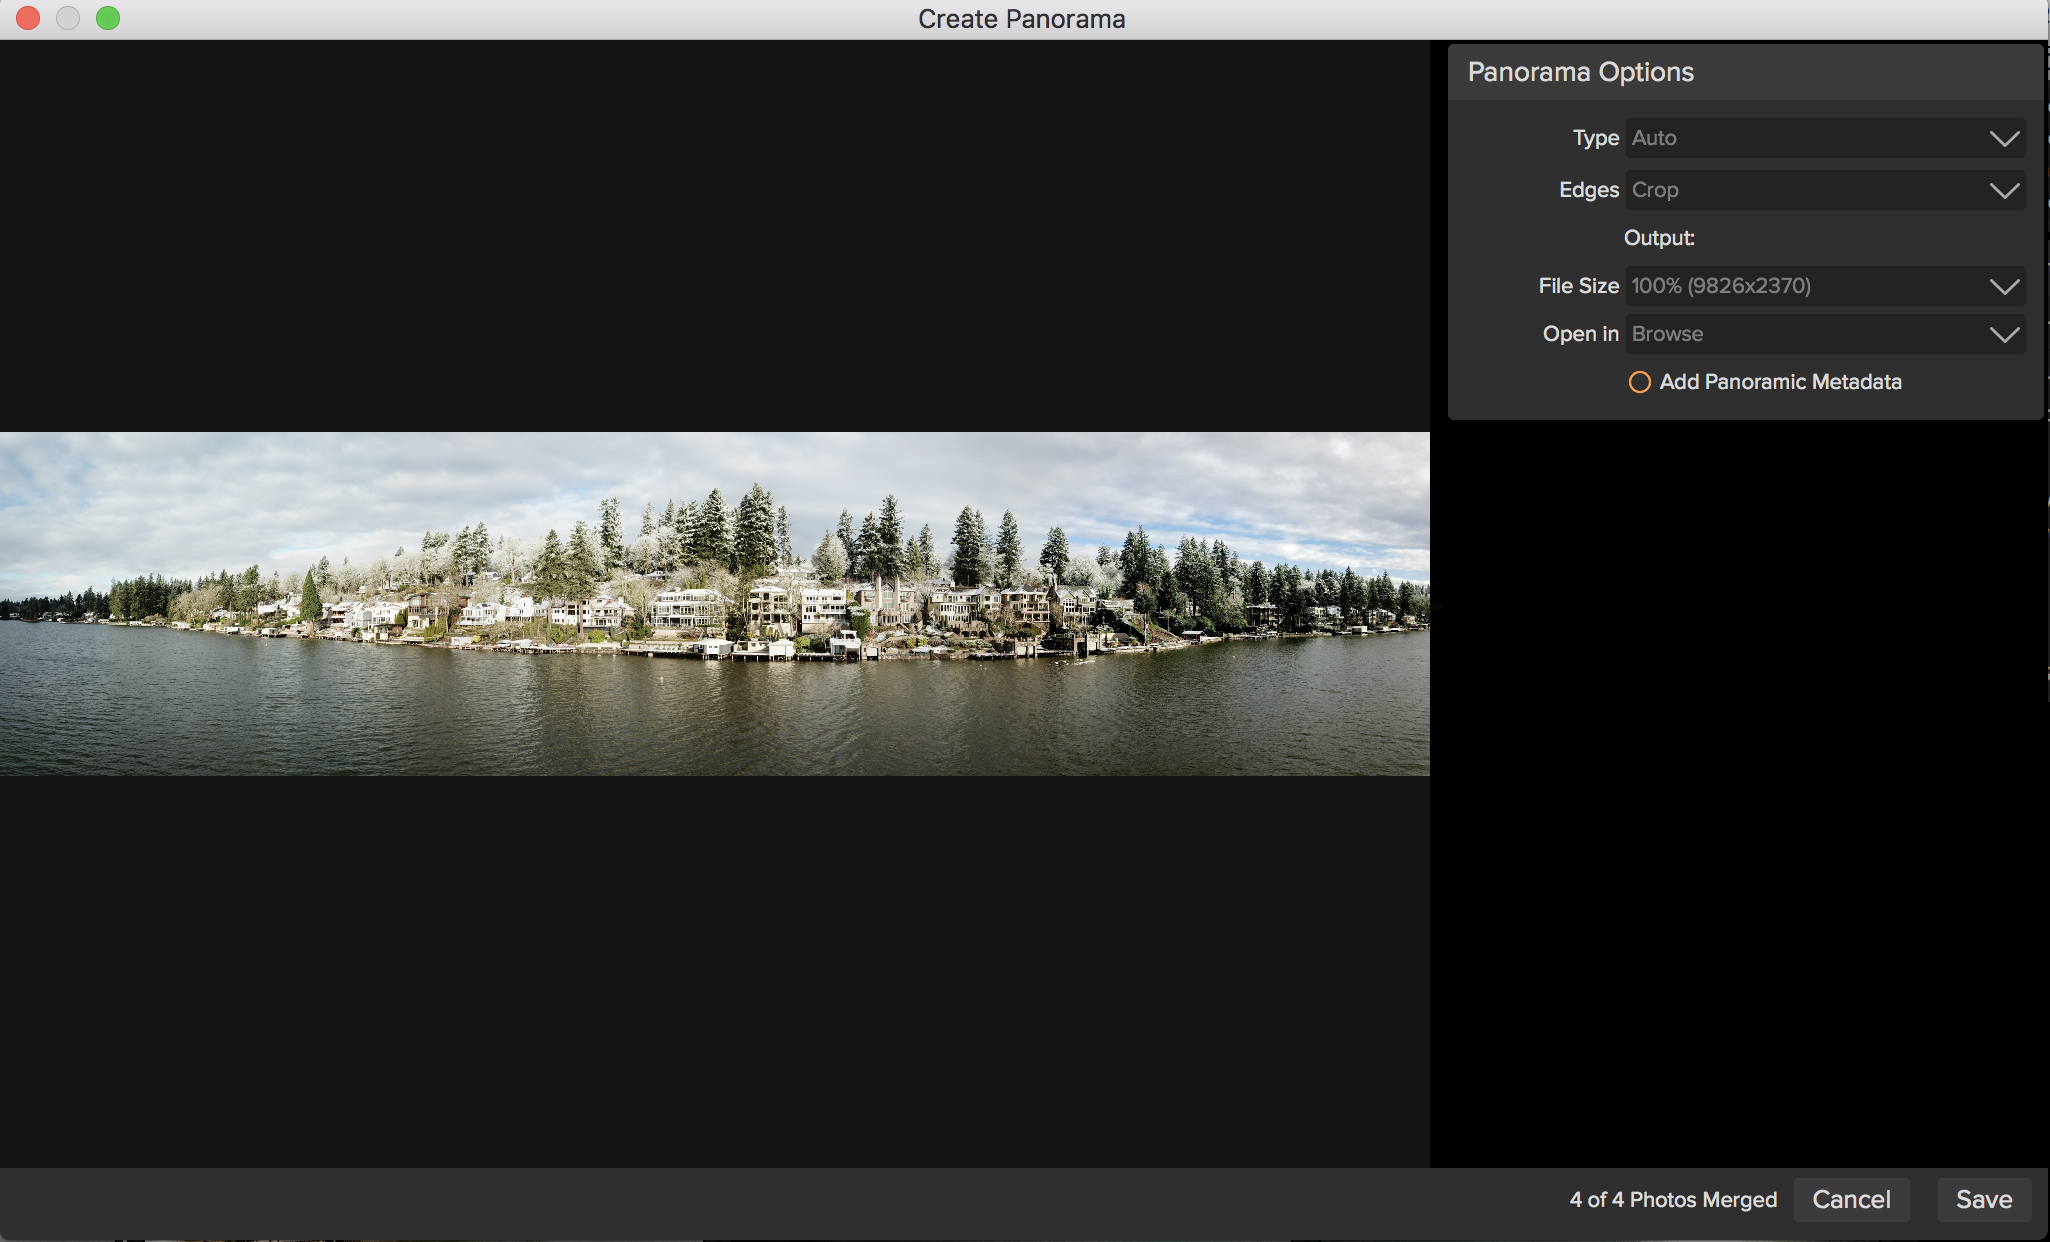


Another feature I use with my drone all the time is Automatic Exposure Bracketing (AEB). DJI’s application lets me choose whether to shoot a set of three or five brackets. Using this feature I get a base exposure, and several additional photos of the same scene exposed a little more or a little less. I can pick the one I like best, or even better combine them into an High-dynamic-range (HDR) photo.
Combining the exposures using the HDR feature in ON1 Photo RAW 2018 reveals more details in the highlights and shadows. You would lose these details when using a single exposure.
I combined five bracketed photos into an HDR then added a few filters in the below picture.
There are several filters in the ON1 Effects module that I frequently use. They let me quickly and easily improve my results.
Here in the Pacific Northwest, we get a lot of cloudy days that can result in dull photos with overcast skies. Adding the Sunshine filter makes a huge difference in these cases. Flat images look brighter and more vibrant with just a few mouse clicks.
The Color Enhancer filter is excellent for improving the appearance of grass and trees. The ‘Foliage’ style in the Color Enhancer turns them vibrant dark green. There is typically no need to create a complex mask when doing this. The filter automatically targets only the green colors.
To get vibrant blue skies, I add a second Color Enhancer and select the ‘Sky’ style. It intelligently applies to just the blue areas, so you don’t get color contamination in the rest of the photo.
When the skies need help, typically on the overcast days, I add a blue Photo Filter. The ‘Blue Grad’ style limits the effect to the top of the photo. I frequently add a luminosity mask to constrain the effect to only the highlights. Adding that mask takes just two mouse clicks and zero brushing.
The Dynamic Contrast filter is another one of my favorites. It brings out the fine details in photos. I also use it to reduce haze.
In the next photo, I made some necessary tone adjustments in the ON1 Develop module first and then added the Dynamic Contrast filter in the Effects module.
The following photo was taken on a cloudy day. The house is North-facing, so it was backlit. Initially, I combined five bracketed photos into an HDR. The sky was too gray for the Color Enhancer to be useful, so I went with the blue Photo Filter technique. However, I did use the Color Enhancer with the Foliage style to pretty up the lawn, trees, and bushes. Lastly, I threw in the fake sun using the ON1 Layers module just for fun.
My DJI Mavic Pro is one of the most fun toys, I mean essential pieces of photography equipment, I’ve acquired in years. It takes excellent photos and with a little editing in ON1 Photo RAW 2018 they are even better. For my needs, ON1 Photo RAW occupies the sweet spot between not having quite enough features (Adobe Lightroom) versus being overly complicated (Adobe Photoshop). Now, whenever I travel, I always look for opportunities to take photos with my drone. There are more panos, HDR images and lighthouse shots to come!
16 comments on “Drone Photography and ON1 Photo RAW 2018”
On May 25, 2018 at 2:54 pm Jan Peterson wrote:
Excellent – both content and pictures!
On May 30, 2018 at 9:14 am John replied:
Thanks!
On May 27, 2018 at 9:24 pm randallpetermckay wrote:
Seriously contemplating a drone Mavic pro or platinum seems to be the best cost to performance and size wise. Are you totally happy with the camera picture quality?
As a keen ameture is there any need to consider the larger model with the 20 mega pixal camera?
any feed back would be appreciated.
Cheers
On May 30, 2018 at 9:13 am John replied:
Hi, I’m very happy with the photo quality on the Mavic Pro. The video is also excellent. That being said I don’t have any experience with the other models. I think the larger sensor in the Phantom 4 Pro probably produces more dynamic range and better low light results. However, for me the portability of the Mavic was more important. Also, combining bracketed photos into HDR produces excellent dynamic range as far as I’m concerned.
Best regards, John
On June 11, 2018 at 5:48 pm Geoff Wagner wrote:
Hi John from Australia – I really appreciated your comments on drone photography and also your video on drone panoramas. Any chance you could be the ‘guest’ tutor for a month on drone photography and ON1 ? I would appreciate more info/advice on both shooting and processing drone images from the Mavic (which incidentally is a brilliant piece of equipment – I love it).
Keep up the great work at ON1 – you guys are really customer responsive and it is appreciated.
Kind regards
Geoff, Adelaide, South Australia
On June 13, 2018 at 8:28 am John replied:
Hi Geoff,
I’m very flattered by your suggestion that I serve as a guest tutor. My confidence level that I have the required expertise isn’t quite there though.
Best regards,
John
On June 11, 2018 at 9:45 pm Richard Walliker wrote:
A terrific article, thank you. I am new to drone photography having recently purchased the DJI Mavic Air. The results I am getting on my still photography are far better than expected and I’ve been using Raw 2018 On1 resize to produce stunning 16×12 inch printed images. This is teaching me that there is another processing tool beyond Lightroom for post processing the complete image and I look forward to exploring On1 Raw to process my drone imagery.
On June 12, 2018 at 3:52 am Mark Druziak wrote:
Excellent! It’s nice to see a written article instead of a video.
On June 12, 2018 at 5:29 am Scott Sheppard wrote:
Are you using ND filters on your Mavic Pro? I just ordered a Mavic Air.
On June 12, 2018 at 11:16 am John replied:
Hi Scott, I did not use any filters. I actually haven’t tried any filters yet.
I’ve heard really good things about the Mavic Air. One guy I talked to had a Mavic Pro and switched to the Air. He really liked the smaller size of the Air and better obstacle detection.
On June 12, 2018 at 9:27 pm Freddie Masarovic wrote:
John, thank you for putting this togehter. I have the same drone and love to use the ON1 advanced features. I just hope there will be more articles on drone photography here so if you have anything to share please do!
I did not realize the Mavic has a lens profile here so will use 🙂
Thank you again please keep it up!
Freddie
Fukuoka, Japan
On June 13, 2018 at 1:21 am Richard Walliker wrote:
I bought the air and have very successfully used the Polar Pro ND filter kit. Terrific build quality and great results.
On June 13, 2018 at 8:31 am John replied:
Hi Richard, thanks for the tip on the filters. I’m definitely going to look into them.
John
On June 14, 2018 at 10:14 am Gordon Hutchinson wrote:
I’ve shot manual panos with my P3S by just turning the drone (no pano mode in the Go app) but they always are distorted putting them together in PS (haven’t tried Photo Raw yet). Are you getting straight panos due to Photo Raw or is it something else?
Thanks…
Gordon
On June 18, 2018 at 11:43 am John replied:
Hi Gordon, before DJI added the pano feature to their app I also shot them by rotating the drone. I had pretty good luck stitching with Lightroom. That was before we added the pano feature to Photo RAW. I’ve noticed the results vary between Photo RAW, LR and PhotoShop. I genuinely do get really good result in Photo RAW. Be sure you have a nice amount of overlap in the photos. Try for ~20% on each side. On the Mavic I can rotate the camera in to portrait mode. I get better result when I do that.
Also, have you tried Litchi’s app for your Phantom rather than DJI GO? It has a built in pano feature. They actually had a pano feature before DJI. You’ll have to check the support for the Phantom 3. It’s a nice app and not too expensive. I tend to switch back and forth between it and DJI Go.
Best regards, John
On August 23, 2018 at 8:52 pm Christopher Boles wrote:
This article came at the right time as I am going to buy the new Mavic Pro 2 for real estate photography. You answered some of the questions I had as to what this drone can do. How much of a learning curve is there to flying this device and the enhancements you have demonstrated here? Thank you for showing also how ON1 does the heavy lifting for stitching and color enhancements.
Please review our our privacy policy for information about how we use the data we collect.