
I remember in school (all those years ago) we used to combine multiple photos either in camera or in the darkroom by sandwiching multiple negatives together. It was a difficult and exacting process, or simply unpredictable at times.
When Adobe® Photoshop® added layers in version 3 (yup, I was using it back then) it was a game changer. Along with layers came two essential tools for manipulating them. First was opacity, which allows us to control how much of a top layers is visible and blends with the layer below. It’s like different thicknesses of paper from vellum to construction paper. The other option is blending modes and this is what I cover in this post.
Blending modes change the math of how the upper layer blends with the layer below it in your layers stack. With opacity it is simply an equal percentage applied to every pixel. With blending modes you control the math at a pixel by pixel level. Over the years the number of blending modes has grown to over 20. However, for us photographers there are a handful we use everyday.
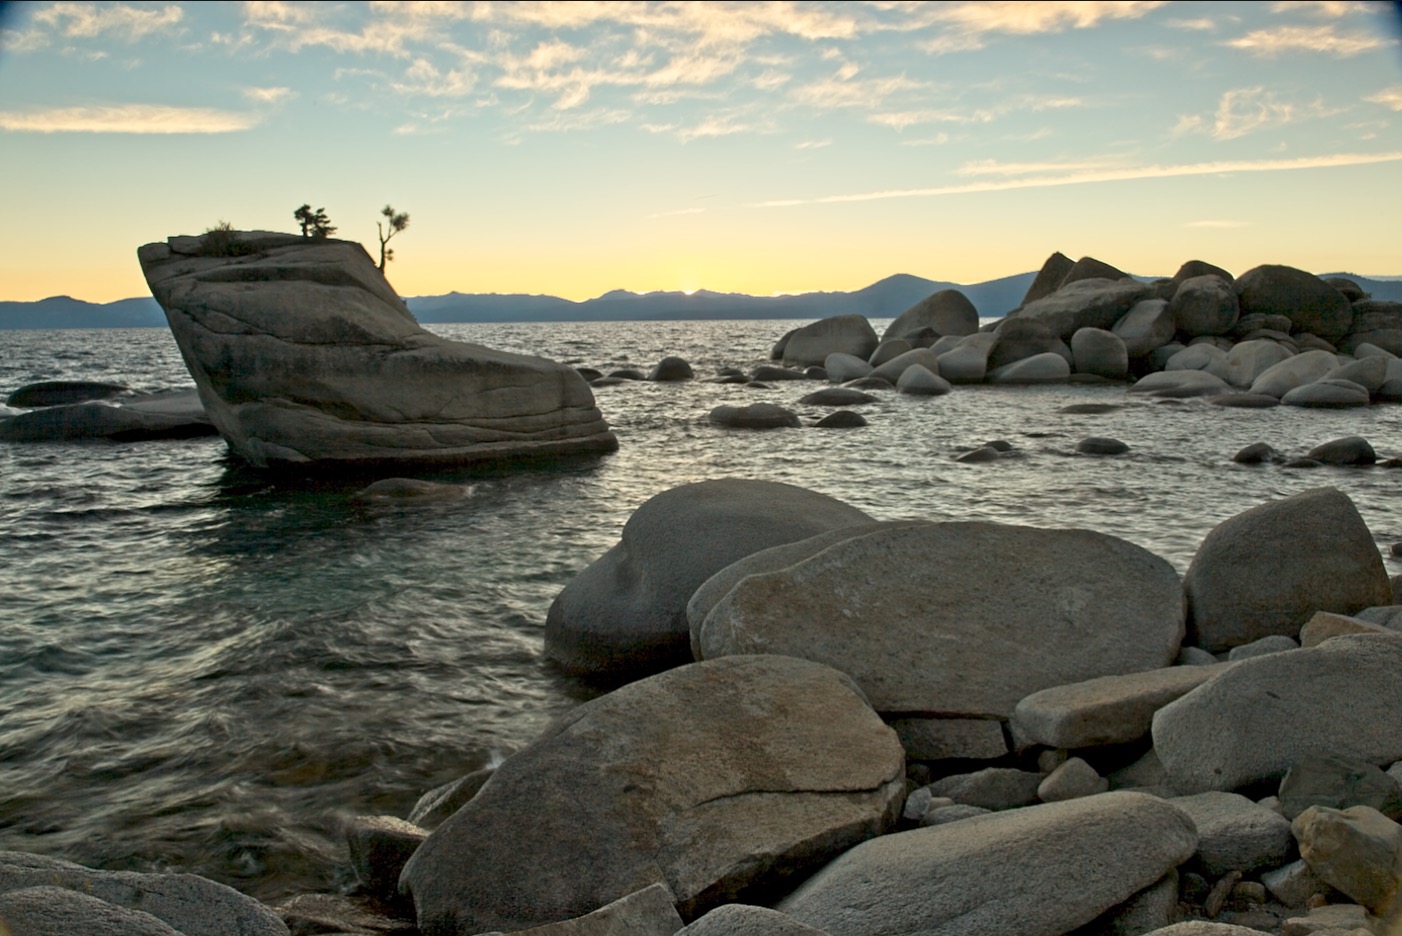
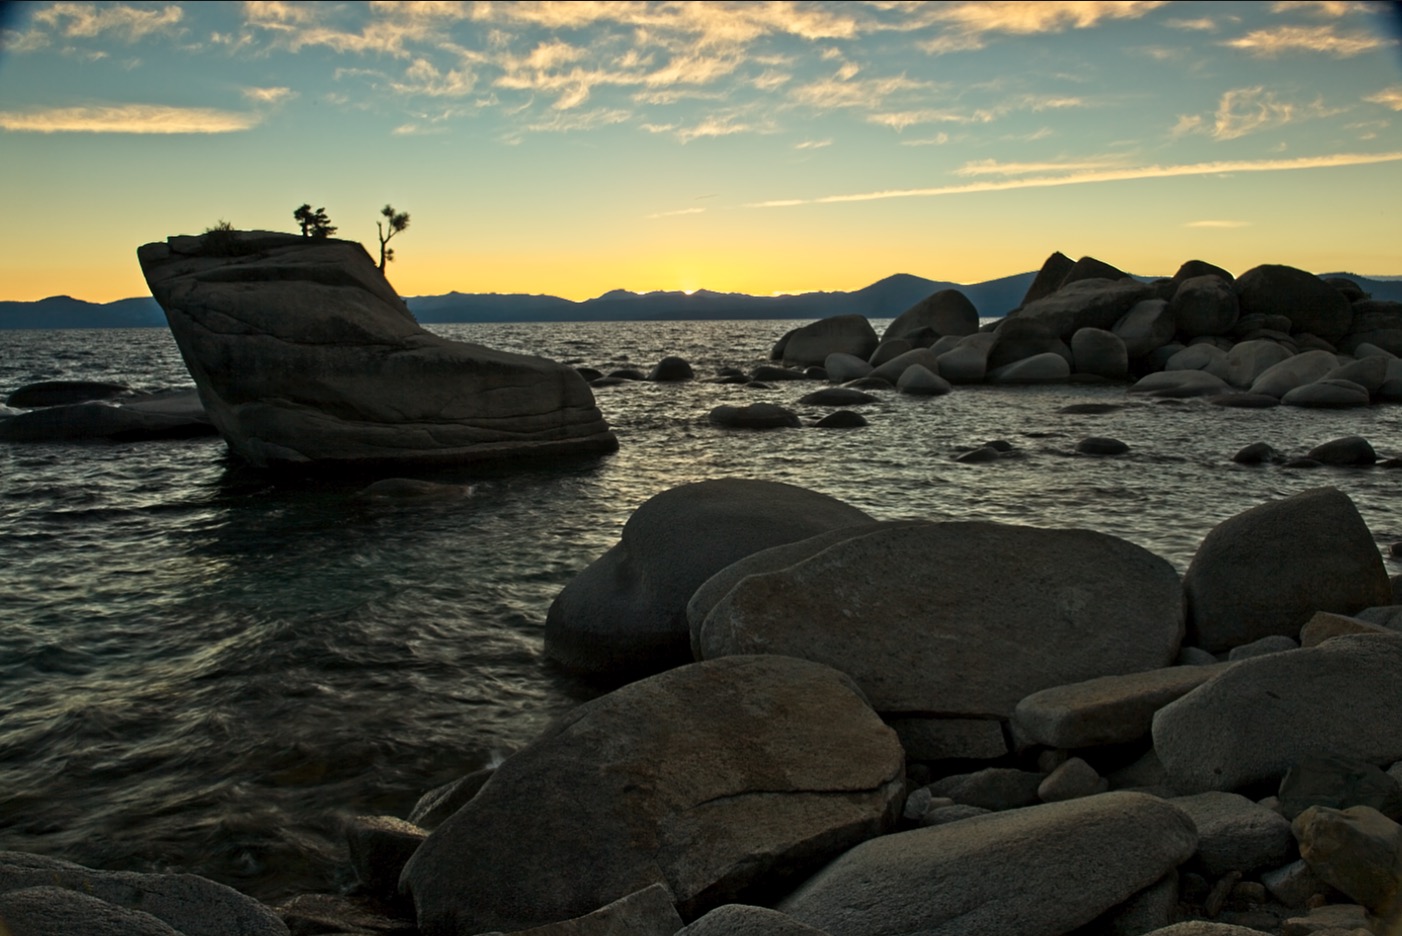
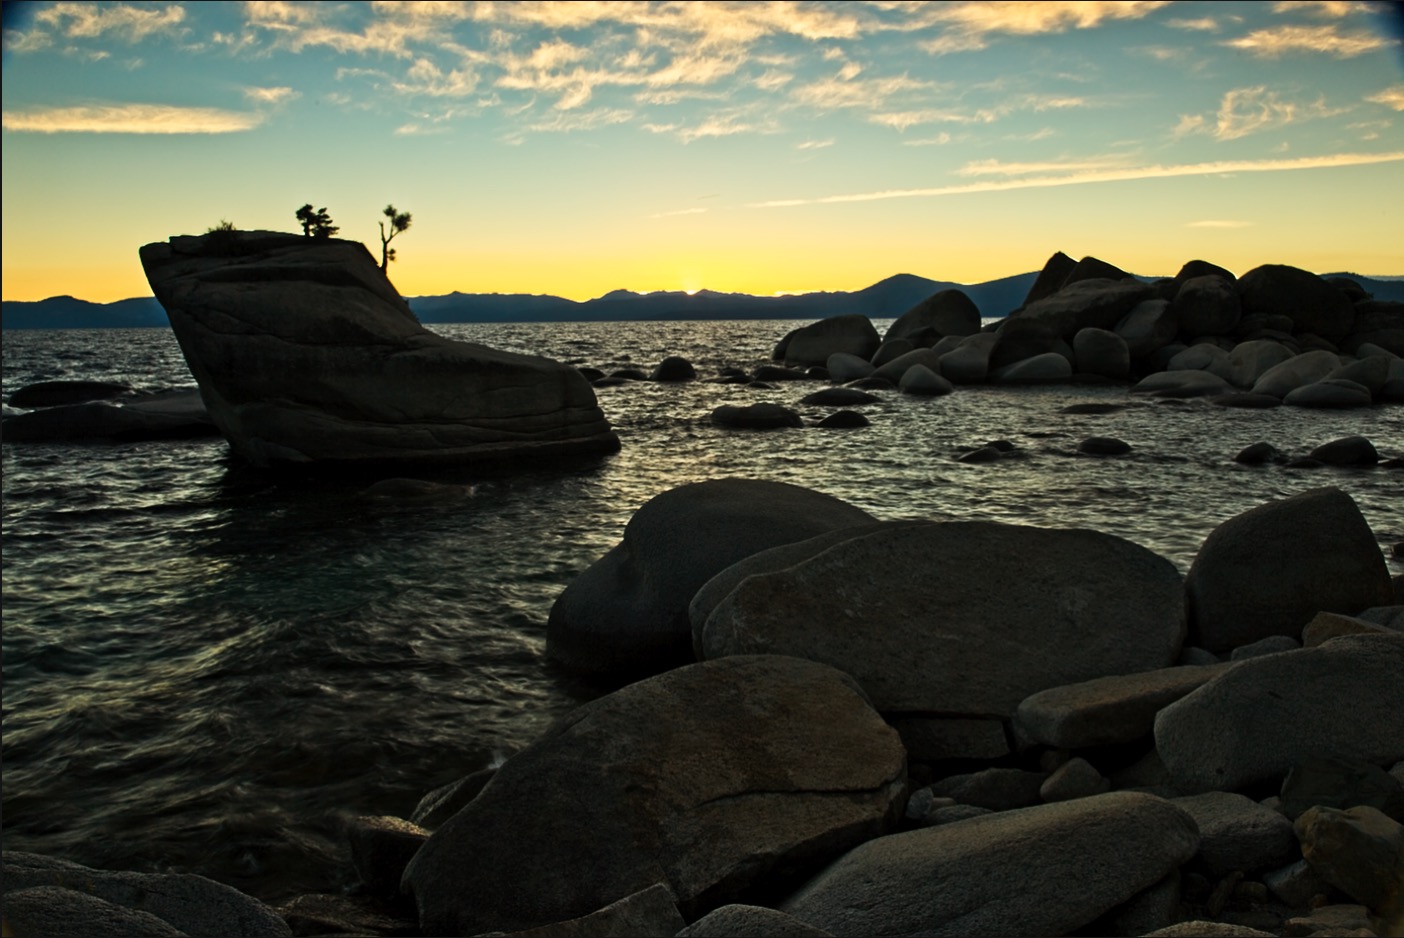
Here is the photo we will use in this example for comparison. Imagine two layers of this same photo, where we adjust the blending mode for the upper layer.
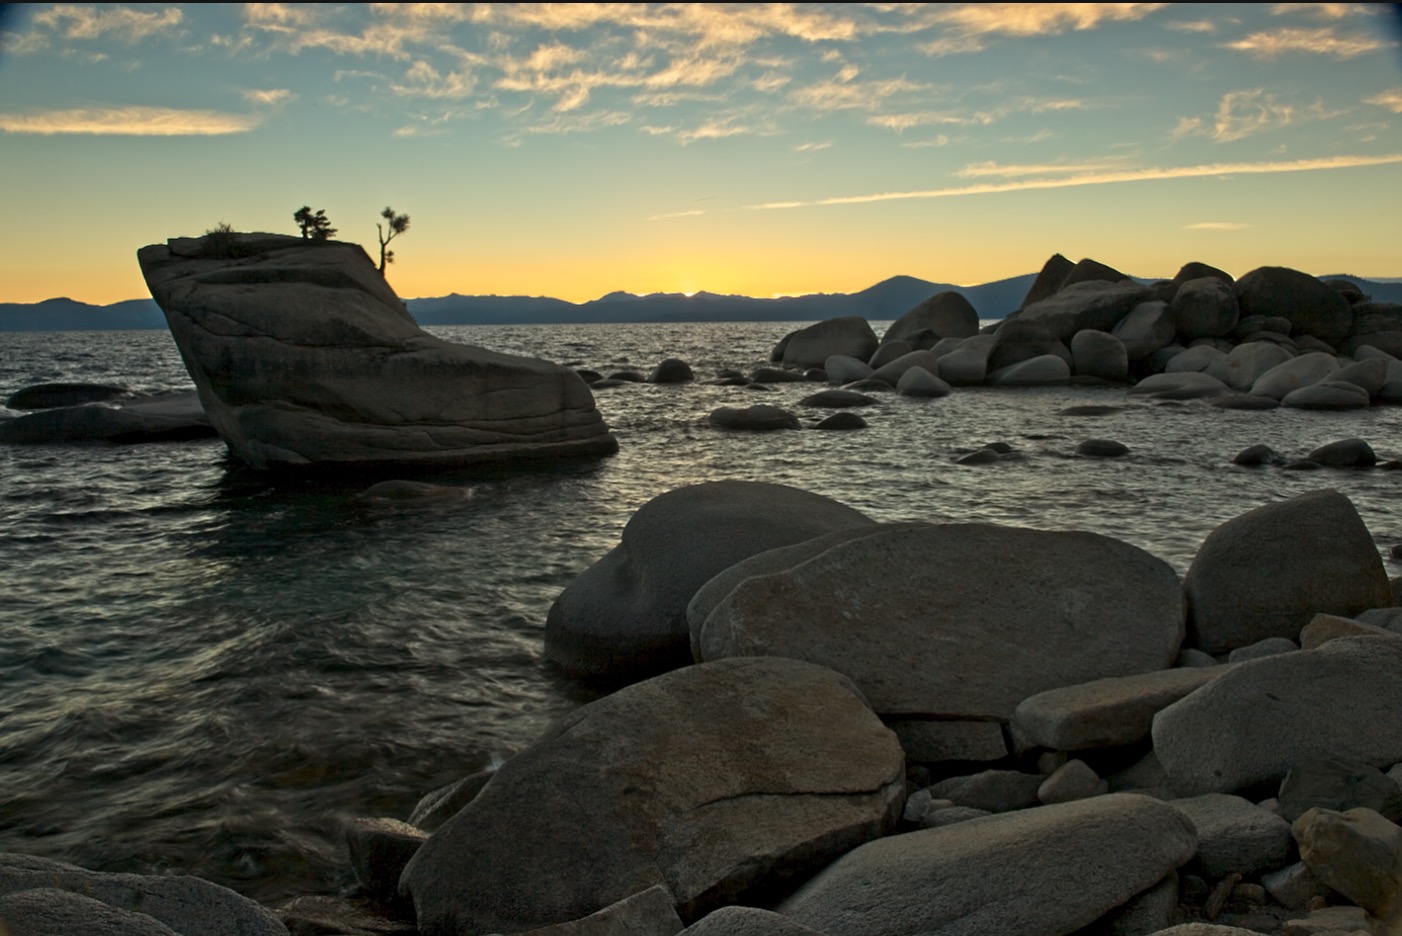
Multiply
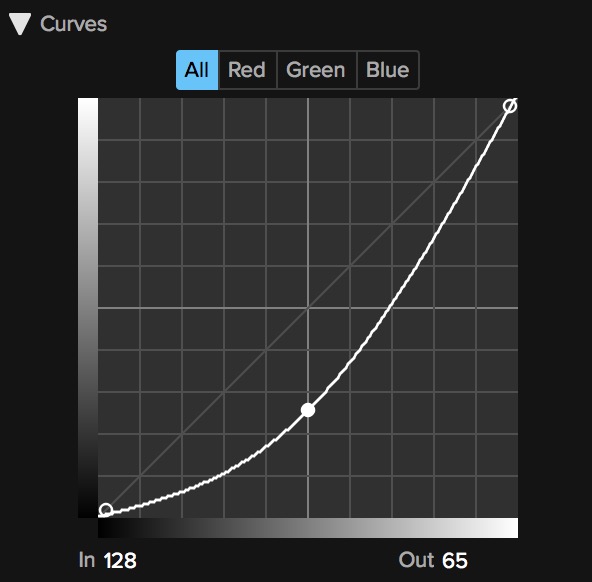
The first two are Multiply and Screen. Think of them as burn and dodge respectively. When you combine two photos with multiply, it takes the normalized decimal value of each pixel on each layer, in the same spot, and multiplies them together, which makes the results darker. Here’s the math if you are into that sort of thing.
ƒ(a,b)=ab where a is the bottom layer and b is the top layer.
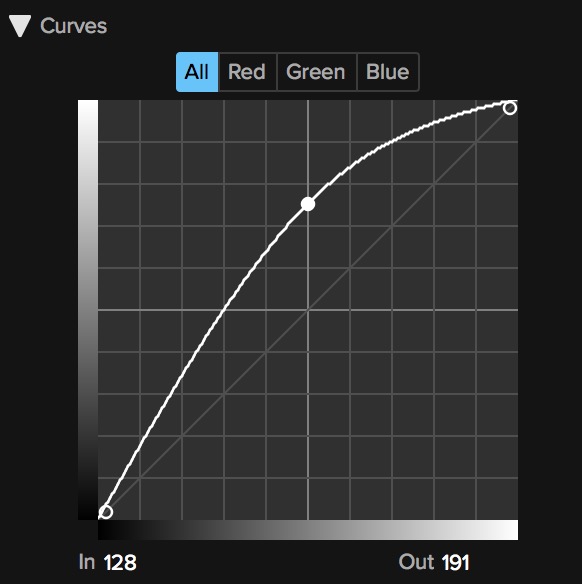
For an example in 8-bit RGB, the way photographers think, middle gray has a value of R128/G128/B128, which in normalized values would be R0.5/G0.5/B0.5. If you had two layers of middle gray and you combined them with multiply, all the resulting pixels would be 0.5 * 0.5 = 0.25, which back in 8-bit RGB would be R64/G64/B64, or roughly half as bright. Consequently this is the same as using the Curve and pulling the midpoint down half-way.
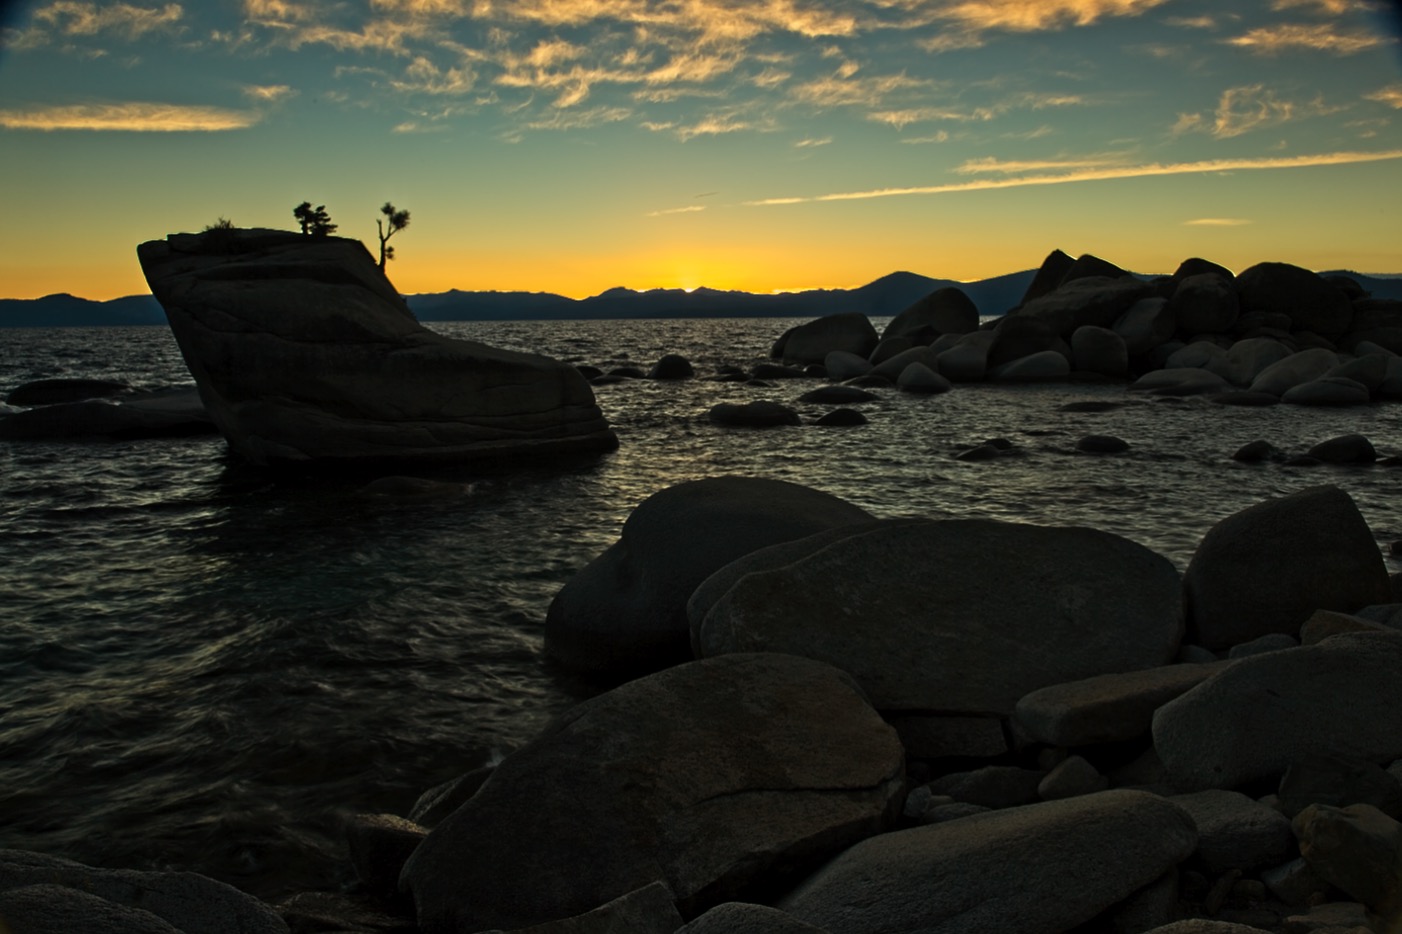
Screen
Screen starts like multiply, but it inverts the numbers on each side of the equation like this.
ƒ(a,b)=1-(1-a)(1-b)
Again in 8-bit RGB for two middle gray layers, R128/G128/B128 becomes R192/G192/B192, which is much brighter. Again, this is the same as using the Curve and pulling the midpoint up half-way.
Overlay & Softlight
Overlay and Softlight increase contrast in both the luminance and color in photos. They work like a combination of multiply and screen, where the darker half of the images use multiply and the brighter half uses screen. Both of these blend modes increase the contrast between two layers. If you are blending two copies of the same photo, it does a great job of increasing the contrast, adding some punch. If you are blending two different photos together, the upper photo becomes a texture. Overlay is the stronger of the two blend modes, where softlight respects the whites and blacks better, for a more natural look.
You can learn more about blending modes by watching Matt Kloskowski’s Blend Mode Basics mini-course in ON1 Plus.
BeginnerDan HarlacherExporting, Printing, & OutputOrganization & Workflow
Please review our our privacy policy for information about how we use the data we collect.